Back to FS2004 SDK Overview

Microsoft
Flight Simulator 2004:
A Century of Flight
Software Development Kit
© 2003 Microsoft Corporation. All rights reserved.
Discreet, 3ds max, and gmax are trademarks of Discreet Logic Inc./Autodesk, Inc., in the
U.S.A. and/or other countries.
Scenery Animation in
Flight Simulator 2004
November 2003

Microsoft Flight Simulator 2004 SDK Scenery Animation
Contents
November 2003.......................................................................................................1
Contents..................................................................................................................2
Introduction.............................................................................................................3
© 2002 Microsoft Corporation. All rights reserved. Page 2 of 7

Microsoft Flight Simulator 2004 SDK Scenery Animation
Introduction
The Scenery Animation SDK explains how to add scenery animation that you’ve created
in 3ds max or gmax™ to Microsoft
®
Flight Simulator 2004. The gmax gamepack SDK
includes the following animation-specific files:
• Animation.doc (this file) (in \docs)
• AnimHouse.gmax (in \scenes)
• House.bmp (in \texture)
• House_lm.bmp (in \texture)
To use this SDK, you should be familiar with animation in gmax or 3ds max, plus general
concepts applicable to scenery objects in Flight Simulator 2004. For more information on
using gmax, makemdl, or imagetool see the information in the various Flight Simulator
2004 gmax SDKs.
Animation System Parameters
The animation system in Flight Simulator 2004 runs at 18 frames per second. So anything
animated will run only at that speed. Currently, 3ds max or gmax will export a total of
1024 frames of animation. This means that, at 18 frames per second, animation loops are
limited to approximately 57 seconds. Scenery animations can only loop in Flight
Simulator — there are no triggers to stop or start animation in the scenery system, so all
animations must loop. Otherwise, you will see a jump in the animation when it switches
from frame 1023 to frame 0.
Shortening the Animation Loop
If you want a loop of animation shorter than 57 seconds, make sure that the time slider in
gmax reflects the length of the animation loop (100 frames = 5.5 seconds, 500 frames =
27.7 seconds, etc.). For more information on setting time segments in gmax, see the gmax
help file.
Preparing your animated model for export
Animating Your Model
Animate your model just like you would animate anything else in 3ds max or gmax. You
can use translation and rotation animations. Make sure that the controllers on your
animated models are as follows:
Position: Bezier Position
Rotation: TCB Rotation or Linear Rotation
Scale: Bezier Scale
Note: We currently do not support any kind of skinned mesh animation (meaning no
vertex animation).
© 2002 Microsoft Corporation. All rights reserved. Page 3 of 7

Microsoft Flight Simulator 2004 SDK Scenery Animation
In the example provided with this SDK, the model animated is the house from the gmax
Scenery Tutorial with a ball bouncing around it. (I included an attached sparking effect to
show that you can do animation and attach points simultaneously.) It has both
translational animation for movement and rotational animation. I have also included a
quick biped-type animation. This was created by linking all the segmented parts directly
to each other (with the body as the root node), and then animating them using the
Interactive IK mode. Because we do not support skinned meshes or bones, this is really
the only way to get IK animations into Flight Simulator. If you do not know how to use
Interactive IK, see the gmax help file.
Naming Your Model
Name your model “tick18_*” as shown below. Note: If the model name does not start
with “tick18_”, the animations will not be exported.
File Hierarchy
Where the animated piece of geometry sits in your file hierarchy is important. It will
determine when that object gets displayed. In AnimHouse.gmax, the animated ball with
attached effect is linked directly below the root node of the scene (the dummy named
AnimHouse). This is because I chose not to create LODs for that object. In this case, it
will always display, and will not switch out any LODs. However, if your animated object
is very high poly count, and you want to create LODs for it, link each of the LODs under
their respective dummy object. So link the tick18_100 under the AnimHouse_LOD_100
and the tick18_50 under the AnimHouse_LOD_050, etc. Notice that I linked the
character under the _LOD_100 node. I linked a lower poly version of the character under
the _LOD_50 node. The character will change to the lower poly model when Flightsim
switches to the 50 LOD and will disappear entirely when Flightsim switches to the 10
LOD.
Make sure you use the same animation on all of the LODs. (It’s best just to copy and
then rename and lower the poly count of the original animated 100 LOD). If you want
the animated object to disappear at a lower LOD level, just create a tick18_100 LOD and
link it to the AnimHouse_LOD_100 dummy. Then don’t create any other LODs for the
animated object. When it switches to the 050 LOD, the animated object will disappear.
© 2002 Microsoft Corporation. All rights reserved. Page 4 of 7
Microsoft Flight Simulator 2004 SDK Scenery Animation
Defining the Bounds of Your Animation
One last thing before you export: Makemdl creates a bounding box around an object that
tells the Flight Simulator camera system whether or not that object is in view. If you’ve
given an object any translational animation, it’s likely to be outside of its original
bounding box most of the time. This means that the Flight Simulator camera system may
stop seeing the object before it’s actually out of view. Simply put, it might make your
object disappear while you are looking at it. Therefore, you have to trick the system into
thinking the object’s bounding box is as big as the area that it covers during its animation
cycle.
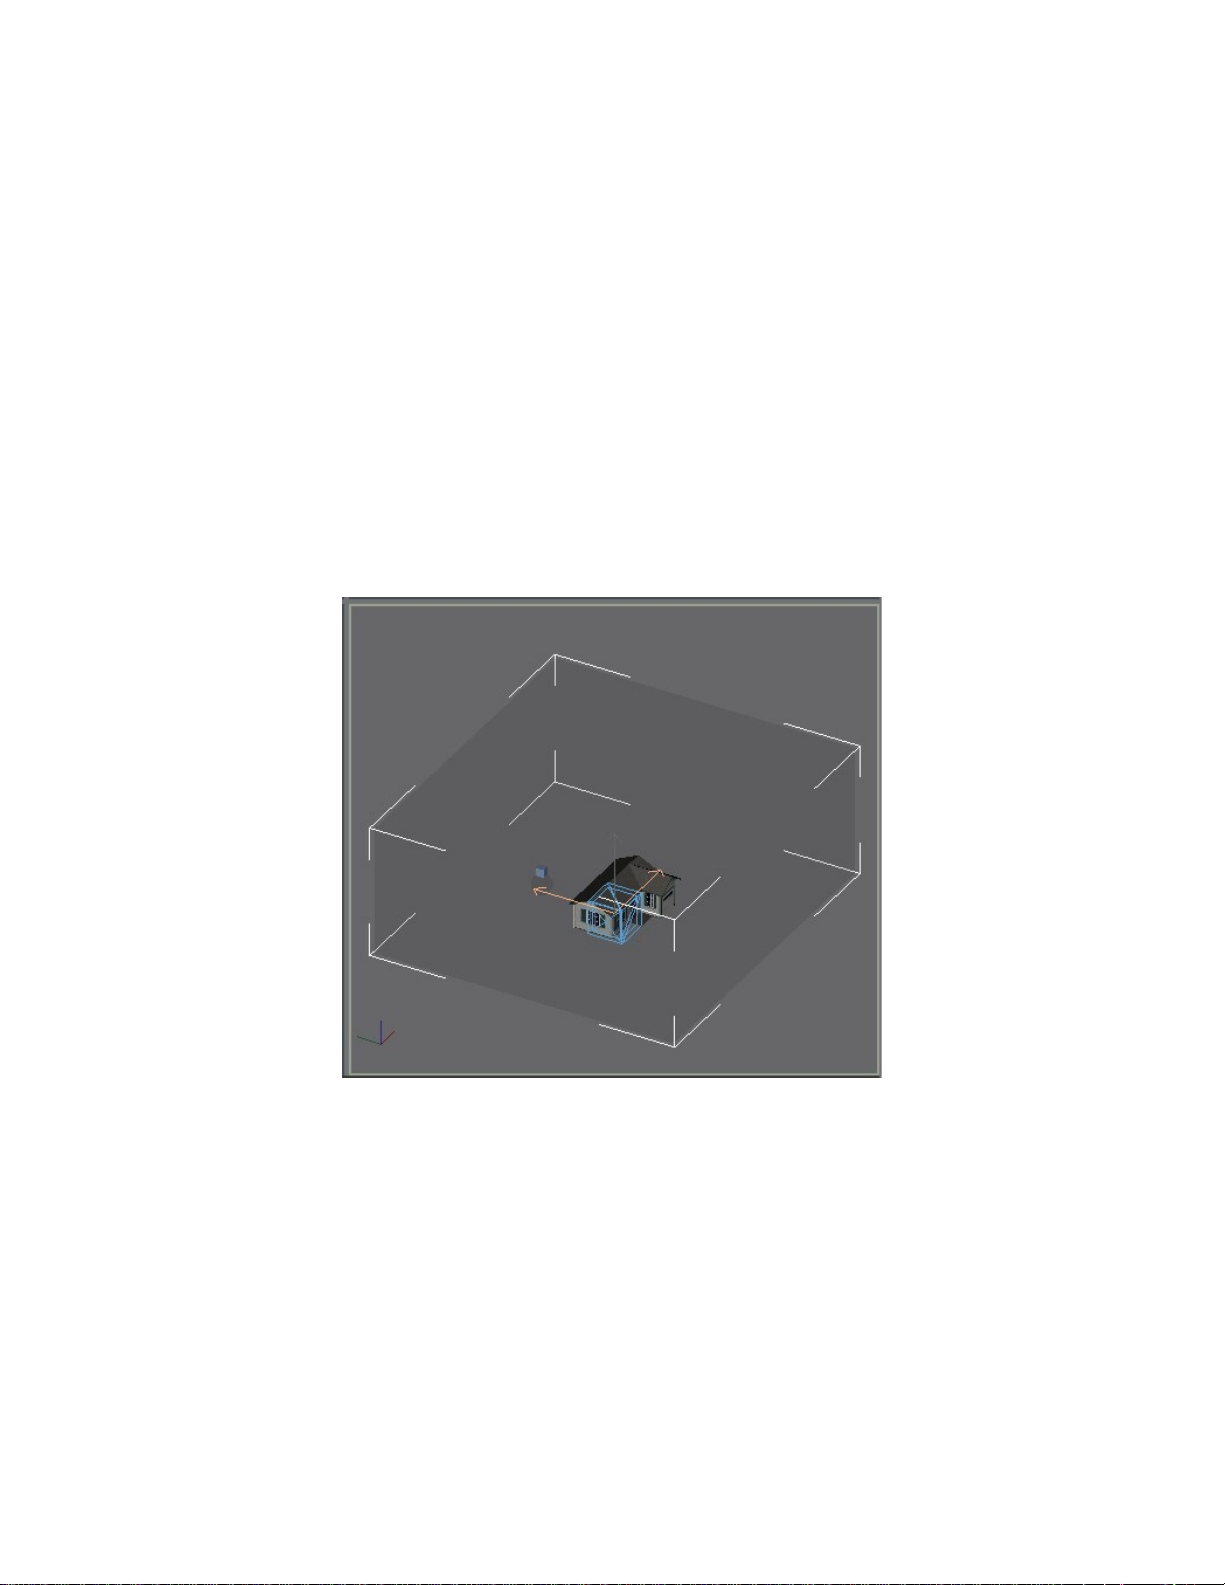
To trick the system
1. Create a box on the ground (as shown below) that is slightly bigger than the area
which the object covers during its animation cycle.
2. Assign this box a material that has an opacity value of zero.
3. Link this box to the root node of the scene. In this case, the dummy called
“AnimHouse”.
When you export your model through makemdl (explained in the next section), makemdl
will remove the object’s geometry, but the object’s bounding box will remain.
© 2002 Microsoft Corporation. All rights reserved. Page 5 of 7

Microsoft Flight Simulator 2004 SDK Scenery Animation
Exporting
Now that you have an object animated to scale and a plane or box that defines the bounds
of that animation, you are ready to export.
To export
1. In gmax, click the File menu, and then select Export ….
2. In the Select File to Export dialog, navigate to the location where you want your
.MDL and .XML file to be exported. Press Save.
3. Edit the .XML file to reflect the exact location where you want the object to appear in
Flight Simulator. (If you do not know how to do this, look at the gmax Scenery
Tutorial SDK and read the section called Exporting the Model to Flight
Simulator. You will also need the BGLComp SDK and the MakeMDL SDK to
export gmax into Flight Simulator.)
4. Use BGLComp to compile the .BGL file.
5. Copy the .BGL file to your Flightsim add-on scenery folder. (C:\Program
Files\Microsoft Games\Flight Simulator 9\Addon Scenery\scenery).
© 2002 Microsoft Corporation. All rights reserved. Page 6 of 7

Microsoft Flight Simulator 2004 SDK Scenery Animation
Viewing Your Animation
Now start Flight Simulator, go to the exact location of your newly placed model, and
watch your beautiful animation in motion!
New Animation in Flight Simulator 2004
© 2002 Microsoft Corporation. All rights reserved. Page 7 of 7